Tuesday, March 30, 2010

Ubuntu သံုးရမွာ ေၾကာက္ေနသလား။

၀င္းဒိုးနဲ႔ အသားက်ေနတဲ့ မိတ္ေဆြေတြ ယူဘြန္းတူ သံုးရမွာ နည္းနည္းေတာ့
ရွိန္ေနၾကမွာေပါ့။ ဒီလို မျဖစ္ရေအာင္ Ubuntu တစ္မ်ိဳနဲ႔ မိတ္ဆက္ေပးပါ
ရေစ။ Ylmf OS တဲ့။ တရုတ္က ေရးထားတာ ျဖစ္ပါတယ္။ window XP သံုး
ေနရ သလိုပါပဲ။ အေသးစိတ္ သိခ်င္ရင္ေတာ့ http://www.ylmf.org/en/
index.html မွာ သြားစံုစမ္းႏုိင္ပါတယ္ ခင္ဗ်ာ။

System Requirement
Bare Minimum
300 MHz x86 processor,128 MB RAM
At least 4 GB of disk space
VGA graphics card capable of 640x480 resolution
Recommended
700 MHz x86 processor
8 GB of disk space,512 MB RAM or bigger
Graphics card capable of 1024x768 resolution or higher

Download Here (678MB)


source:ubuntu4mm

Saturday, March 27, 2010

Sound Forge 9.0

ဒီတစ္ခါေတာ့Audioသမားေတြအႀကိဳက္ေပါ့။
အသံဖုိင္ေတြကုိစိတ္ႀကိဳက္တည္းျဖတ္လုပ္နုိင္
တဲ့Softwareေပါ့။တကယ္
အသုံး၀င္တဲ့Software
ေလးပါ။Crackဖုိင္ပါတစ္ခါတည္းပါၿပီးသားေနာ္။
Filesizeကေတာ့နည္းနည္းမ်ားလုိ႔ႏွစ္ပုိင္းခြဲေပး
ထားပါတယ္။

Download Here
Sound Forge 9.0 Part 1

Sound Forge 9.0 Part 2

Thursday, March 25, 2010

Winodws 7 မွာ Partition ဘယ္လုိခြဲမလဲ

မေန႔ကကြ်န္ေတာ္ laptopတစ္လုံးwindowsျပန္တင္တယ္ဗ်ာ။တင္ထားတာကwindows7။နဂိုတုန္းက
Harddiskကုိpartition ပုိင္းထားတာက2ပုိင္းတည္းရယ္။အခု3ပုိင္း၊ပုိင္းခ်င္တာနဲ႔ကုိယ့္မွာရွိတဲ့Partition
Expertကုိတင္ေတာ့supportမလုပ္ဘူးဗ်ာ။ဒါနဲ႔ဘယ္လိုလုပ္ရမလဲဆုိၿပီးေတြးေနတုန္းသူငယ္ခ်င္းကဂ်ာ နယ္ေလးလွမ္းေပးပါတယ္။ယူၾကည္႔လုိက္ေတာ့ဒါေလးကုိေတြ႔လုိက္တာပဲ။ဘာsoftwareမွမလုိပဲ windowsကေပးထားတဲ့အတုိင္းpartitionလုပ္နည္းေလးပါ။နည္းပညာကုိမွ်ေ၀ခ်င္တဲ့ဆႏၵနဲ႔ကြ်န္ေတာ့္ ဘေလာ့မွာတင္ျဖစ္တင္တာကုိစာေရးသူသိရင္နားလည္ေပးပါလုိ႔ဒီေနရာကေနႀကိဳၿပီးေတာင္းပန္ပါတယ္။

Create and format a hard disk partition

Harddiskတစ္ခုကုိpartition(0r)volumeအပိုင္းတစ္ပုိင္းခြဲရန္အတြက္administratoraccountထဲမွ၀င္ေရာက္

ရမွာျဖစ္ၿပီးharddiskေပၚရွိextendedpartitionsမ်ားတြင္freespace(0r)unallocatedspaceရွိရမွာျဖစ္ပါတယ္။

လက္ရွိရွိထားၿပီးသားpartitionတစ္ခုကုိformatခ်ျခင္းျဖင့္အဆုိပါpartitionေပၚတြင္သိမ္းဆည္းထားေသာအ

ခ်က္အလက္မ်ားအားလုံးကုိဖ်က္ပစ္မွာျဖစ္သည္႔အတြက္Dataမ်ားကုိbackupလုပ္ၿပီးသိမ္းထားဖုိ႔လုိပါတယ္။

Start>ControlPannel>System&Security(categoryview)>Administrative(create&format_harddisk_

partition)ကုိအဆင့္ဆင့္၀င္ေရာက္လုိက္ပါ။Disk_management_boxေပၚလာပါမယ္။ပုံကုိၾကည္႔ပါ။


အဆိုပါပုံမွာျပထားတဲ့ Data (G)ဆုိတဲ့ disk partition ကုိ formatခ်ပါမယ္။


ျမင္ေနရတဲ့ partition တစ္ခုကို format လုပ္ဖုိ႔အတြက္ အဆုိပါ volume ေပၚမွာ Right Click ေပးလုိက္ပါ။ေပၚလာတဲ့ pop up menu ေပၚက format ကုိေရြးပါ။


ေပၚလာတဲ့သတိေပးခ်က္မွာdisk/volumeေပၚရွိအခ်က္အလက္အားလုံးကုိဖ်က္ပစ္မွာမုိ႔backupလုပ္ထားရန္

ႏွင့္ဆက္လက္လုပ္ေဆာင္မည္လားကုိေမးထားျခင္းျဖစ္ပါတယ္။(dataမ်ားကုိbackupလုပ္ၿပီသား(သုိ႔)မလုပ္

လုိပဲformatခ်လုိသျဖင့္ OK ကုိႏွိပ္ပါ။format box ေပၚလာပါမယ္။


Volume lebel မွာမိမိစိတ္ႀကိဳက္ အမည္ေပးနုိင္ပါတယ္။ဖုိင္စနစ္ကုိ NTFS ထားရပါမယ္။ေအာက္ပုံမွာ Volume(G)ကုိ Format လုပ္ၿပီးသားပုံျဖစ္ပါတယ္။


Delete a hard disk partition

Hard_disk_partitionတစ္ခုကုိဖ်က္ရန္အတြက္administrator_accountထဲမွ၀င္ေရာက္ရမွာျဖစ္ပါတယ္။

Partition_volumeတစ္ခုကုိဖ်က္ၿပီးတဲ့အခါမွာnew_partitionတစ္ခုတည္ေဆာက္ဖုိ႔အတြက္ေနရာလြတ္ရ

နုိင္ပါၿပီ။သင့္ရဲ႕harddiskဟာsigle_partitionတစ္ခုျဖစ္ေနမယ္ဆုိရင္ဒီpartitionကုိဖ်က္လုိ႔မရပါဘူး။သင့္အ

ေနနဲ႔systempartiton,boot_partitionနဲ႔Virtual_memroy_paging_fileေတြပါေနတဲ့partitionကုိဖ်က္လုိ႔မရ

ပါဘူး။ဒါေတြဟာWinodwsတက္နုိင္ဖုိ႔အတြက္လုိအပ္ေနလုိ႔ပါ။Start>ControlPannel>System&Security

(categoryview)>Administrative(create&format_harddisk_partition)ကုိအဆင့္ဆင့္၀င္ေရာက္လုိက္ပါ။

Disk_management_boxေပၚလာပါမယ္။ပုံကုိၾကည္႔ပါ။Extended_partition(logical_driveပါ၀င္ေနသည္႔)

အပုိင္းတစ္ခုကုိဖ်က္မွာျဖစ္ပါတယ္။

မိမိဖ်က္လုိေသာpartitionေပၚမွာRightClickလုပ္ပါ။ေပၚလာတဲ့popup_menuေပၚကdelete_volumeကိုေရြးပါ။

Delete_simple_volume_boxေပၚလာပါတယ္။သတိေပးခ်က္မွာvolumeေပၚရွိအခ်က္အလက္မ်ားကုိဖ်က္

ပစ္မွာမုိ႔backupလုပ္ထားရန္ႏွင့္ဆက္လက္လုပ္ေဆာင္မည္လားကုိေမးတာျဖစ္ပါတယ္။yesကိုႏွိပ္လိုက္ပါ။

ဒီအခါမွာဖ်က္လုိက္တဲ့Extended_partitionကုိပုံမွာအတုိင္းFree_spaceအျဖစ္ျမင္ရပါမယ္။ခုတစ္ခါFree

spaceတစ္ခုကုိလည္းdelete_partitionလုပ္နုိင္တဲ့ေအာက္ကပုံကုိၾကည္႔ပါ။

Primary_partitionတစ္ခုကုိdeleteလုပ္ၿပီးရင္Unallocated_disk_spaceအျဖစ္ျမင္ရမွာျဖစ္ၿပီးExtended

_patitionတစ္ခုရဲ႕Logical_driveကုိdeleteလုပ္ၿပီးရင္free_spaceအျဖစ္နဲ႔ေနရာလြတ္ေတြကုိေတြ႔ရပါမယ္။


Extend a hard disk partition


Hard_diskရဲ႕partitionတစ္ခုကုိေနရာတိုးခ်ဲ႕ဖုိ႔အတြက္ပုံမွာျပထားတဲ့အတုိင္းတုိးခ်ဲ႕မယ့္partitionရဲ႕ကပ္

လ်က္ညာဘက္မွာUnallocated_space(or)Free_spaceရွိရပါမယ္။ခုျပထားတဲ့ပုံမွာACER(C:)ကုိကပ္လ်က္

မွာရွိတဲ့Unallocated_spaceနဲ႔ေပါင္းပါမယ္။Extended_volumeလုပ္ပါမယ္။

အဆိုပါPartitionေပၚမွာRight_Clickေပးပါ။ေပၚလာတဲ့Popup_menuေပၚမွာExtended_volumeကုိေရြးပါ။

Extend_Volume_Winzar_Boxေပၚလာပါမယ္။

Next_buttonကုိႏွိပ္ပါ။

ပုံမွာမိမိရယူလုိေသာပမာဏကုိျပင္ဆင္ရယူနုိင္ပါတယ္။

ပုံမွာExtened_volumeၿပီးစီးေၾကာင္းကုိေဖာ္ျပထားၿပီFinish_buttonကုိႏွိပ္ပါ။တုိးခ်ဲ႕ထားတဲ့Extend_volumeတစ္ခု

ျပဳလုပ္ၿပီးစီးပုံကုိေဖာ္ျပထားပါတယ္။

ပုံမွာextendလုပ္ၿပီးသာျမင္ကြင္းျဖစ္ပါတယ္။


Source: Net Guide Journal

Tuesday, March 23, 2010

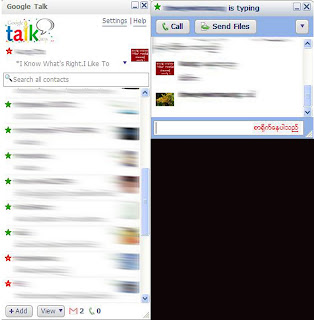
Google Talk Style


ဒါကေတာ GTalk ရဲ႕ ပုံစံ Style ေလးေတြကုိ အမ်ိဳးမ်ိဳး ေျပာင္းခ်င္သူမ်ား အတြက္ပါ။လုပ္နည္းကေတာ့ လြယ္ပါတယ္ ။

(၁) အဆင္ေျပတဲ့ Link ကေန Download လုပ္ယူပါ .
(၂) ရလာတဲ့ ဖုိင္ အားလုံးကုိ Copy ကူးယူ လိုက္ၿပီးရင္ C:\Program Files\Google\Google Talk မွာသြားၿပီး paste လိုက္ပါ .. paste လုပ္တဲ့ အခါမွာ တစ္ခုခုေမးလာရင္ yes all ေပးလိုက္ပါ။(အဲဒီအခ်ိန္မွာ မိမိ Gtalk ကုိေတာ့ ပိတ္ထားဖုိ႔လုိတယ္ေနာ္)အဲဒါဆို ရပါၿပီ။အဆင္ေျပမယ္လို႔ ထင္ပါတယ္ ။ပုံေလးကုိၾကည္႔လုိက္ပါ။ႀကိဳက္ရင္ေတာ့ ေအာက္မွာ ယူလိုက္ပါ။


Download ifile.it | Download mediafire


Source : ညီေနမင္း

Saturday, March 20, 2010

ေရြးခ်ယ္စရာ Network Card မ်ား

NetworkCardဆိုတာကေတာ့ကၽြန္ေတာ္တို႔Computerတစ္လံုးနဲ႔တစ္လံုးNetworkခ်ိတ္ဆက္ရာမွာအသံုးျပဳရမယ့္
Deviceျဖစ္ပါတယ္။NetworkCardရဲ႕လုပ္ေဆာင္ခ်က္ကဘာကိုလုပ္ေဆာင္တာလဲဆိုရင္Computerေတြတစ္လံုးႏွင့္
တစ္လံုးDataေတြပို႔ရာမွာSignalေတြကိုNetworkေပၚမွာပို႔ေဆာင္ေပးျခင္း၊လက္ခံေပးျခင္းတို႔ကိုျပဳလုပ္ေပးပါတယ္။
NetworkCardေတြမွာအမ်ိဳးအစားအမ်ားႀကီး႐ွိပါတယ္။NetworkCardေတြမွာအမ်ိဳးအစားအမ်ားႀကီး႐ွိသလိုComputer
ေတြဟာလဲတစ္ခုႏွင့္တစ္ခုမတူညီၾကပါဘူး။ဥပမာအေနနဲ႔ေျပာရမယ္ဆိုရင္RJ45Connector,-BNC_Connetorစတဲ့
Connectorတို႔ပဲျဖစ္ပါတယ္။NetworkCardေတြမွာ႐ွိတဲ့Connectorေတြဟာတစ္ခုႏွင့္တစ္ခုမတူညီသလိုအလုပ္လုပ္တဲ့
ပံုစံလဲမတူညီပါဘူး။NetworkCardေတြဟာတစ္ခုႏွင့္တစ္ခုမတူညီတဲ့အေၾကာင္းရင္းကေတာ့-
-Network Topology
-Bandwidth
-Network Card Type စတဲ့ အခ်က္ေတြေၾကာင့္ပဲ ျဖစ္တယ္။


အခုဆုိရင္ကၽြန္ေတာ္တို႔ျမန္မာျပည္မွာေရပန္းအစားဆံုးအသံုးအမ်ားဆံုုးကေတာ့RJ45Connectorပါတဲ့NetworkCard
ပဲျဖစ္ပါတယ္။ကၽြန္ေတာ္အခုေ႐ြးခ်ယ္စရာNetworkCardမ်ားဆိုတဲ့အတိုင္းမိမိႀကိဳက္ႏွစ္သက္တဲ့NetworkCardကိုေရြး
ခ်ယ္ႏိုင္ဖို႔အတြက္ေဖာ္ျပေပးလုိက္ပါတယ္။ဒါေပမယ့္ကၽြန္ေတာ္ေဖာ္ျပေပးမယ့္NetworkCardေတြကေတာ့RJ45Conn
-ectorပါတဲ့NetworkCardအေၾကာင္းကိုပဲေျပာျပေပးသြားမွာျဖစ္ပါတယ္။NetworkCardကိုထုတ္လုပ္တဲ့ကုမၸဏီေတြက
ေတာ့အမ်ားႀကီးပဲ႐ွိတယ္။အဲ့ဒီထဲကမွPopularအျဖစ္ဆံုးNetworkCardေတြကေတာ့Prolinkႏွင့္DLinkတို႔ပဲျဖစ္ပါတယ္။


အဲ့ဒီNetworkCardေတြကေစ်းႏႈန္းလည္းခ်ိဳသာတယ္။လူႀကိဳက္လဲမ်ားတယ္။ေနာက္ၿပီးအဲ့ဒီNetworkCardေတြကိုအသံုး
ျပဳရတာအဆင္လည္းေျပတယ္။ဒါေပမယ့္မိမိကNetworkCardတစ္ခုကို၀ယ္ေတာ့မယ္ဆိုရင္NetworkCardSpeedႏွင့္
PCIorUSBCardစတဲ့အခ်က္ေတြကိုစဥ္းစားဖုိ႔ေတာ့လုိအပ္တယ္။NetworkCardSpeedဆိုတာNetworkေပၚမွာမိမိရဲ႕
DataကိုTransferလုပ္ေပးႏိုင္တဲ့Speedကိုေျပာတာျဖစ္ပါတယ္။ဥပမာအေနနဲ႔ေျပာရရင္10Mbps,100Mbps,1Gbps
လားဆုိတာကိုစဥ္းစားရမယ္။1Gbpsဆိုရင္ေတာ့အေကာင္းဆံုးပဲေပါ့ဗ်ာ။PCIorUSBCardဆိုတာကNetworkCardမွာ
PCISlotမွာစိုက္ၿပီးအသံုးျပဳရတဲ့NetworkCard႐ွိသလိုUSBနဲ႔လာတဲ့NetworkCardလဲ႐ွိပါတယ္။ဒီေနရာမွာကၽြန္ေတာ္
ေျပာခ်င္တာကUSBနဲ႔ဆိုရင္ေတာ့မိမိNetworkCardရဲ႕DataTransferRateကေႏွးေနပါလိမ့္မယ္။PCIဆိုရင္ေတာ့မိမိ
NetworkCardရဲ႕DataTransferRateကျမန္ေနပါလိမ့္မယ္။သို႔ေသာ္USBNetworkCardသည္အလြယ္တကူNetwork ခ်ိတ္ဆက္အသံုးျပဳႏိုင္ၿပီးPCINetworkCardကေတာ့ကြန္ပ်ဴတာရဲ႕SystemUnitထဲကMotherboardေပၚမွာ႐ွိတဲ့PCI
Slotထဲမွာထိုးစိုက္ထားရတာျဖစ္လို႔အလြယ္တကူNetworkခ်ိတ္အသံုးျပဳမယ္ဆိုရင္မလြယ္ကူပါဘူး။အဲဒီေတာ့မိမိက
NetworkCardတစ္ခုကိုေရြးခ်ယ္၀ယ္ယူေတာ့မယ္ဆုိရင္NetworkCard,ConnectorTypeႏွင့္NetworkCardသည္အ
လြယ္တကူျဖဳတ္တပ္အသံုးျပဳမွာလားစတဲ့အခ်က္ေတြကိုစဥ္းစားၿပီးေရြးခ်ယ္၀ယ္ယူၾကေပါ့ေနာ္။ဒါဆိုရင္မိမိကဘယ္လုိNet
-workCardမ်ိဳးကိုေရြးခ်ယ္၀ယ္ယူသင့္သလဲဆိုတာကိုနားလည္ေလာက္ၿပီလို႔ထင္ပါတယ္။ကၽြန္ေတာ့္ရဲ႕ေရြးခ်ယ္စရာNet
-workCardမ်ားအေၾကာင္းကိုလည္းဒီနားမွာပဲရပ္နားလိုက္ပါေတာ့မယ္။

source:ICT Reader

Friday, March 19, 2010

Linux Ebooks

ဒီေန႔ေတာ့Microsoftတင္မဟုတ္ပဲLinuxကုိစိတ္၀င္စားသူေတြအတြက္ပါသတင္းေကာင္းေလးပါ။LinuxVersionမ်ားျဖစ္
တဲ့ReHat9.0နဲ႔Fedora9ကုိinstallionလုပ္ပုံအဆင့္ဆင့္ေရးသားထားတဲ့Ebooksေလးေတြေအာက္မွာDownloadလင့္ေပး
ထားပါတယ္။Mediafireနဲ႔ဆုိေတာ့အားလုံးအဆင္ေျပမယ္ထင္ပါတယ္။ကဲ....ေျပာေနတာၾကာပါတယ္။ခုပဲေဒါင္းလုိက္ၾကရ
ေအာင္ဗ်ာ............
Fedora 9
Linux OS
Linux OS Myanmar Language

Friday, March 12, 2010

အသုံး၀င္ေသာ Run Command မ်ား

Runဆိုတဲ့အဓိပၸါယ္နဲ႔အညီသူကေျပးတာပါ။ဆိုလိုတဲ့သေဘာကေတာ့ရန္ကုန္ကေနခ်င္းျပည္နယ္သြားမယ္ဆိုပါစို႔ဒီအတိုင္း
သြားမယ္ဆိုလွ်င္ကား၊ရထားတဆင့္ျပီးတဆင့္ေပါ့။ဒါေပမဲ့Runမွာဆိုရင္ီေတာ့တခါတည္းနဲ႔မပင္ပန္းဘဲေရာက္မယ္ေလဆို
ေတာ႔Runကအသံုး၀င္တာေပါ့ဒီမ်ိဳးဘဲကြန္ပ်ဳတာမွာဆိုMicrosoftwordကိုဖြင့္မယ္ဆိုပါစို႔။Start>Programs>Microsoft
-Office>Winwordေပါ့ဒီလိုဆိုအဆင့္ကလဲမ်ားတာေပါ့။ဒါေပမဲ့Runမွာက်ေတာ့Windowlogo+Rကိုႏွိပ္ျပီးWinwordကိုဖြင့္
မယ္ဆိုရင္ဒီမွာwinwordဆိုျပီးရိုက္ျပီးေတာ့Enterကိုႏွိပ္လိုက္နဲ႔တခါတည္းပြင့္လာမွာပါဆိုေတာ့အခ်ိန္ကုန္သက္သာတာတဲ့
အျပင္typingလဲအက်င့္ျဖစ္တာေပါ့ျပီးေတာ့အထူးသျဖင့္ေနရာအတိအက်သိတဲ့ဟာမ်ိဳးRegistryလိုမ်ိဳးဆိုရင္လည္းRunမွာ
regeditလိုရိုက္ျပီးenterေခါက္ေပါ့ဆိုေတာ့Runက
အမ်ားႀကီးအက်ိဳးျပဳပါတယ္။ဒီအျပင္WebsiteကိုလဲRunမွာလိပ္စာဥပမာ
www.ucspfamily.blog
spot.comဆိုျပီးရိုက္ထည့္ရင္လဲဖြင့္္လာမွာျဖစ္ပါတယ္။ျပီးေတာ့Folderေတြကိုလဲသူရဲ႔ေနရာအတိ
အက်
သိရင္သြားလို႔ရပါတယ္။ဥပမာc:/windowsဆိုျပီးဖြင့္လို႔ရပါတယ္ဆုိေတာ့ကၽြန္ေတာ္ကဒီအေၾကာင္းေလးနဲ႔အသံုး၀င္ပံု
ေလးကိုေျပာျပတာဘဲျဖစ္ပါတယ္.ဘာျဖစ္လို့လဲဆိုေတာ့ေတာ္ေတာ္မ်ားမ်ားကRunမွာသံုးလို႔ရေသာcommandsမ်ားဆိုျပီး
တင္ေပမယ့္အသံုးမျပဳဘူးတဲ့သူမ်ားအတြက္အထူးအဆန္းျဖစ္မွာစိုးလို႔အက်ိဳးရွိပံုေလးကိုေဖာ္ျပေပးလိုပါတယ္။ေအာက္မွာ
အသံုးျပဳလို႔ရေသာcommands ေလးေတြကိုေဖာ္ျပေပးလိုက္ပါတယ္။
To Access…

Run Command
Accessibility Controls

access.cpl
Accessibility Wizard

accwiz
Add Hardware Wizard

hdwwiz.cpl
Add/Remove Programs

appwiz.cpl
Administrative Tools

control admintools
Adobe Acrobat (if installed)

acrobat
Adobe Designer (if installed)

formdesigner
Adobe Distiller (if installed)

acrodist
Adobe ImageReady (if installed)

imageready
Adobe Photoshop (if installed)

photoshop
Automatic Updates

wuaucpl.cpl
Bluetooth Transfer Wizard

fsquirt
Calculator

calc
Certificate Manager

certmgr.msc
Character Map

charmap
Check Disk Utility

chkdsk
Clipboard Viewer

clipbrd
Command Prompt

cmd
Component Services

dcomcnfg
Computer Management

compmgmt.msc
Control Panel

control
Date and Time Properties

timedate.cpl
DDE Shares

ddeshare
Device Manager

devmgmt.msc
Direct X Control Panel (if installed)*

directx.cpl
Direct X Troubleshooter

dxdiag
Disk Cleanup Utility

cleanmgr
Disk Defragment

dfrg.msc
Disk Management

diskmgmt.msc
Disk Partition Manager

diskpart
Display Properties

control desktop
Display Properties

desk.cpl
Display Properties (w/Appearance Tab Preselected)

control color
Dr. Watson System Troubleshooting Utility

drwtsn32
Driver Verifier Utility

verifier
Event Viewer

eventvwr.msc
Files and Settings Transfer Tool

migwiz
File Signature Verification Tool

sigverif
Findfast

findfast.cpl
Firefox (if installed)

firefox
Folders Properties

folders
Fonts

control fonts
Fonts Folder

fonts
Free Cell Card Game

freecell
Game Controllers

joy.cpl
Group Policy Editor (XP Prof)

gpedit.msc
Hearts Card Game

mshearts
Help and Support

helpctr
HyperTerminal

hypertrm
Iexpress Wizard

iexpress
Indexing Service

ciadv.msc
Internet Connection Wizard

icwconn1
Internet Explorer

iexplore
Internet Properties

inetcpl.cpl
Internet Setup Wizard

inetwiz
IP Configuration (Display Connection Configuration)

ipconfig /all
IP Configuration (Display DNS Cache Contents)

ipconfig /displaydns
IP Configuration (Delete DNS Cache Contents)

ipconfig /flushdns
IP Configuration (Release All Connections)

ipconfig /release
IP Configuration (Renew All Connections)

ipconfig /renew
IP Configuration (Refreshes DHCP & Re-Registers DNS)

ipconfig /registerdns
IP Configuration (Display DHCP Class ID)

ipconfig /showclassid
IP Configuration (Modifies DHCP Class ID)

ipconfig /setclassid
Java Control Panel (if installed)

jpicpl32.cpl
Java Control Panel (if installed)

javaws
Keyboard Properties

control keyboard
Local Security Settings

secpol.msc
Local Users and Groups

lusrmgr.msc
Logs You Out Of Windows

logoff
Malicious Software Removal Tool

mrt
Microsoft Access (if installed)

msaccess
Microsoft Chat

winchat
Microsoft Excel (if installed)

excel
Microsoft Frontpage (if installed)

frontpg
Microsoft Movie Maker

moviemk
Microsoft Paint

mspaint
Microsoft Powerpoint (if installed)

powerpnt
Microsoft Word (if installed)

winword
Microsoft Syncronization Tool

mobsync
Minesweeper Game

winmine
Mouse Properties

control mouse
Mouse Properties

main.cpl
Nero (if installed)

nero
Netmeeting

conf
Network Connections

control netconnections
Network Connections

ncpa.cpl
Network Setup Wizard

netsetup.cpl
Notepad

notepad
Nview Desktop Manager (if installed)

nvtuicpl.cpl
Object Packager

packager
ODBC Data Source Administrator

odbccp32.cpl
On Screen Keyboard

osk
Opens AC3 Filter (if installed)

ac3filter.cpl
Outlook Express

msimn
Paint

pbrush
Password Properties

password.cpl
Performance Monitor

perfmon.msc
Performance Monitor

perfmon
Phone and Modem Options

telephon.cpl
Phone Dialer

dialer
Pinball Game

pinball
Power Configuration

powercfg.cpl
Printers and Faxes

control printers
Printers Folder

printers
Private Character Editor

eudcedit
Quicktime (If Installed)

QuickTime.cpl
Quicktime Player (if installed)

quicktimeplayer
Real Player (if installed)

realplay
Regional Settings

intl.cpl
Registry Editor

regedit
Registry Editor

regedit32
Remote Access Phonebook

rasphone
Remote Desktop

mstsc
Removable Storage

ntmsmgr.msc
Removable Storage Operator Requests

ntmsoprq.msc
Resultant Set of Policy (XP Prof)

rsop.msc
Scanners and Cameras

sticpl.cpl
Scheduled Tasks

control schedtasks
Security Center

wscui.cpl
Services

services.msc
Shared Folders

fsmgmt.msc
Shuts Down Windows

shutdown
Sounds and Audio

mmsys.cpl
Spider Solitare Card Game

spider
SQL Client Configuration

cliconfg
System Configuration Editor

sysedit
System Configuration Utility

msconfig
System File Checker Utility (Scan Immediately)

sfc /scannow
System File Checker Utility (Scan Once At The Next Boot)

sfc /scanonce
System File Checker Utility (Scan On Every Boot)

sfc /scanboot
System File Checker Utility (Return Scan Setting To Default)

sfc /revert
System File Checker Utility (Purge File Cache)

sfc /purgecache
System File Checker Utility (Sets Cache Size to size x)

sfc /cachesize=x
System Information

msinfo32
System Properties

sysdm.cpl
Task Manager

taskmgr
TCP Tester

tcptest
Telnet Client

telnet
Tweak UI (if installed)

tweakui
User Account Management

nusrmgr.cpl
Utility Manager

utilman
Windows Address Book

wab
Windows Address Book Import Utility

wabmig
Windows Backup Utility (if installed)

ntbackup
Windows Explorer

explorer
Windows Firewall

firewall.cpl
Windows Magnifier

magnify
Windows Management Infrastructure

wmimgmt.msc
Windows Media Player

wmplayer
Windows Messenger

msmsgs
Windows Picture Import Wizard (need camera connected)

wiaacmgr
Windows System Security Tool

syskey
Windows Update Launches

wupdmgr
Windows Version (to show which version of windows)

winver

Windows XP Tour Wizard

tourstart

Wordpad

write


Source :IT Reshare

Thursday, March 4, 2010

Gmail မွာ Filter စစ္နည္း

သင္တို႔ရဲ႕ေမးလ္ကုိ၀င္လုိက္တာနဲ႔Inboxမွာတင္ေခါင္းမူးသြားနုိင္ပါတယ္။အဲဒီလုိမျဖစ္ဖုိ႔filterစစ္ထားလုိက္ရင္မမူး
ေတာ့ဘူးေပါ့။ဒီအေၾကာင္းကုိသိၿပီးတဲ့သူေတြလဲရွိပါတယ္။ကြ်န္ေတာ္ရည္ရြယ္တာကမသိေသးတဲ့သူေတြအတြက္ပါ။
သိၿပီးတဲ့သူေတြကေတာ့သီးခံၿပီးဖတ္ေပးၾကပါ။ေအာက္မွာပုံေလးေတြနဲ႔ရွင္းျပေပးသြားမွာပါ။ကုိယ္filterလုပ္ခ်င္တဲ့သူ
ရဲ႕ေမးလ္(အနည္းဆုံးတစ္ေစာင္)ကုိCheckMarkေလးထည္႔ေပးပါ။ၿပီးရင္ညာဘက္အေပၚနားကMoreActionကုိက
လစ္လုိက္ပါ။Menuေလးတစ္ခုက်လာပါ့မယ္။Filter message like these ကုိကလစ္ပါ။


အဲဒါဆုိရင္ေအာက္မွာျပထားတဲ့ပုံလုိစာမ်က္ႏွာကုိေရာက္သြားပါမယ္။Fromဆုိတဲ့ေနရာမွာသ႔ူရဲ႕လိပ္စာေရာက္ေနတာက
ုိေတြ႔ရမွာပါ။တကယ္လုိ႔မ်ားကုိယ္filterစစ္တဲ့လူကgmailaccountတစ္ခုထက္ပုိခဲ့ရင္address2ခုရဲ႕ၾကားမွာORထည္႔ေပး
လုိက္ပါ(eg.xxxxx@gmail.com_OR_xxxx@gmail.com)။ၿပီးရင္ေအာက္မွာျမင္ရတဲ့ေမးလ္ေတြကသူ႔ဆီက၀င္လာတဲ့
ေမးလ္ေတြပါပဲ။ကြ်န္ေတာ္ျပထားတဲ့ပုံမွာေတာ့တစ္ေစာင္ပဲျပထားပါတယ္။အားလုံးၿပီးသြားၿပီဆုိရင္ေတာ့NextStepနဲ႔သြား
လုိက္ပါ။( _=space )


ေနာက္အဆင့္မွာကုိယ္ဘာလုပ္ခ်င္သလဲဆိုတာကုိေရြးေပးရပါ့မယ္။အဓိကကေတာ့့filterပါပဲ။ေအာက္မွာျပထားတဲ့4ခ်က္ကုိ Check Mark ထည္႔ေပးပါ။
1.SkipInboxဆိုတာကinboxမွာမ၀င္ေစခ်င္လုိ႔ပါ။တကယ္လုိ႔အဲဒီေနရာမွာCheckMarkမထည္႔ဘူးဆုိရင္သင္ဖန္တီးလုိက္
တဲ့Labelမွာရယ္၊Inboxမွာရယ္2ေနရာ၀င္မွာပါ။အဲဒါေၾကာင့္Check Markထည္႔ရတာပါ။
2.ApplyLabelကေတာ့မိမိသတ္မွတ္လုိက္တဲ့Labelထဲကုိေရာက္သြားေစဖုိ႔ပါ။ေလာေလာဆယ္မွာLableမရွိေသးတဲ့အ
တြက္ChooseLabelကုိကလစ္ပါ။က်လာတဲ့MenuကNewLabelကုိေရြးပါ။မိမိစိတ္ႀကိဳက္နာမည္ေပးၿပီးသြားရင္OKကုိက
လစ္လုိက္ပါ။
3.Alsoapplyfilter...........ကုိCheckMarkထည္႔ရတာကေတာ့ေအာက္မွာက်လာတဲ့ေမးလ္ေတြကုိပါတစ္ခါတည္းသတ္မ
ွတ္လုိက္တဲ့Labelထည္႔ကုိေရြ႕ဖုိ႔အတြက္ပါ။
4.ၿပီးရင္ေတာ့ ေနာက္ဆုံးအဆင့္အေနနဲ႔CreateFilterကုိ ကလစ္လုိက္ပါ။


(ဒီေနရာမွာေျပာခ်င္တာကေနာက္ထပ္လုပ္လုိ႔ရတာေတြရွိပါေသးတယ္။ဥပမာေျပာရရင္........
1.Deleteit ကုိ CheckMark ေပးခဲ့ရင္ ဖ်က္ပစ္ပါမယ္။
2.ForwarditကုိCheckMarkေပးခဲ့ရင္သင္ပုိ႔ခ်င္တဲ့gmailaddressထည္႔ေပးရပါမယ္။သင့္ရဲ႕တျခားအေကာင့္၊ဒါမွမဟုတ္တ
ျခားေသာသူငယ္ခ်င္းမ်ားဆီကုိပုိ႔လုိ႔ရပါတယ္။)အားလုံးၿပီးသြားရင္ေတာ့ေအာက္ကျပထားတဲ့ပုံလုိျမင္ရမွာပါ.....


ၿပီးရင္Inboxကုိသြားလုိက္ပါ။Inbox,SendMail,Chat,Draftတု႔ိရဲ့ေအာက္မွာမိမိဖန္တီးလုိက္တဲ့Labelနာမည္ေလး
ေတြ႔ရပါလိမ့္မယ္။ေအာ္....Labelေဘးက(Default)အျဖဴေရာင္ေပၚမွာေထာက္ၿပီးကုိယ္ႀကိဳက္တဲ့အေရာင္ေျပာင္းလို႔
ရေသးတယ္ေနာ္။


Monday, March 1, 2010

Portable Re- Enable Tools

ကြ်န္ေတာ္ဘေလာ့စ္မွာတင္ထားၿပီးသမွ်ပုိ႔စ္ေတြကသူမ်ားဆီကယူထားတာေတြ မ်ားေနေတာ့ကုိယ္တုိင္ပုိ႔စ္တစ္ခုေလာက္ထပ္တင္ခ်င္လုိ႔စဥ္းစားတာဘာတင္ရမွန္း
မသိျဖစ္ေနတုန္းGoogleမွာရွာရင္းေတြတာေတြေလးကုိအားလုံးကုိမွ်ေ၀ပါရေစ။
ဘာလဲဆုိေတာ့Disableျဖစ္ေနတာေတြကုိEnableျပန္လုပ္ေပးနုိင္တဲ့Software ေလးပါ။ေအာက္မွာျပထားတဲ့ပုံအတုိင္းအားလုံးေပါင္း12မ်ဳိးအထိရပါတယ္။

အလုပ္လုပ္ပုံကေတာ့softwareေလးကုိdoubleclickၿပီးrunတာန႔ဲselectallလုပ္
ၿပီးသားပါ။အဲဒီထဲကမွကုိယ္လုပ္ခ်င္တာကုိခ်န္ၿပီးက်န္တာေတြကုိလုိက္ျဖဳတ္ၿပီး
ReEnable ကုိကလစ္လုိက္ရုံပါပဲ။ Restart ေတာင္းပါမယ္။Yesဆုိၿပီးrestartခ်
လုိက္ေပါ့။Windowsျပန္တက္လာနဲ႔Enableျဖစ္သြားပါလိမ့္မယ္(ကုိယ္လုပ္လုိက္
တဲ့ဟာတစ္ခုခုေပါ့ဗ်ာ)။လုိခ်င္ရင္ေတာ့ ဒီမွာ ယူလုိက္ပါ ။ေလာေလာဆယ္မွာကြ်န္
ေတာ္ကေတာ့ runbox တစ္ခုတည္းပဲစမ္းၿပီးတင္ေပးလုိက္တာပါ။အဆင္ေျပၾကပါ
ေစ....